Reviving a Roberts Radio
Published on: 10th June 2026
I’m obsessed with radio. I have one in almost every room of the house (I don’t spend enough time in the bathroom) and listen to radio far more than watch TV. I’m also mad for the Raspberry Pi and have read enough articles about combining the two that it was worth a go.
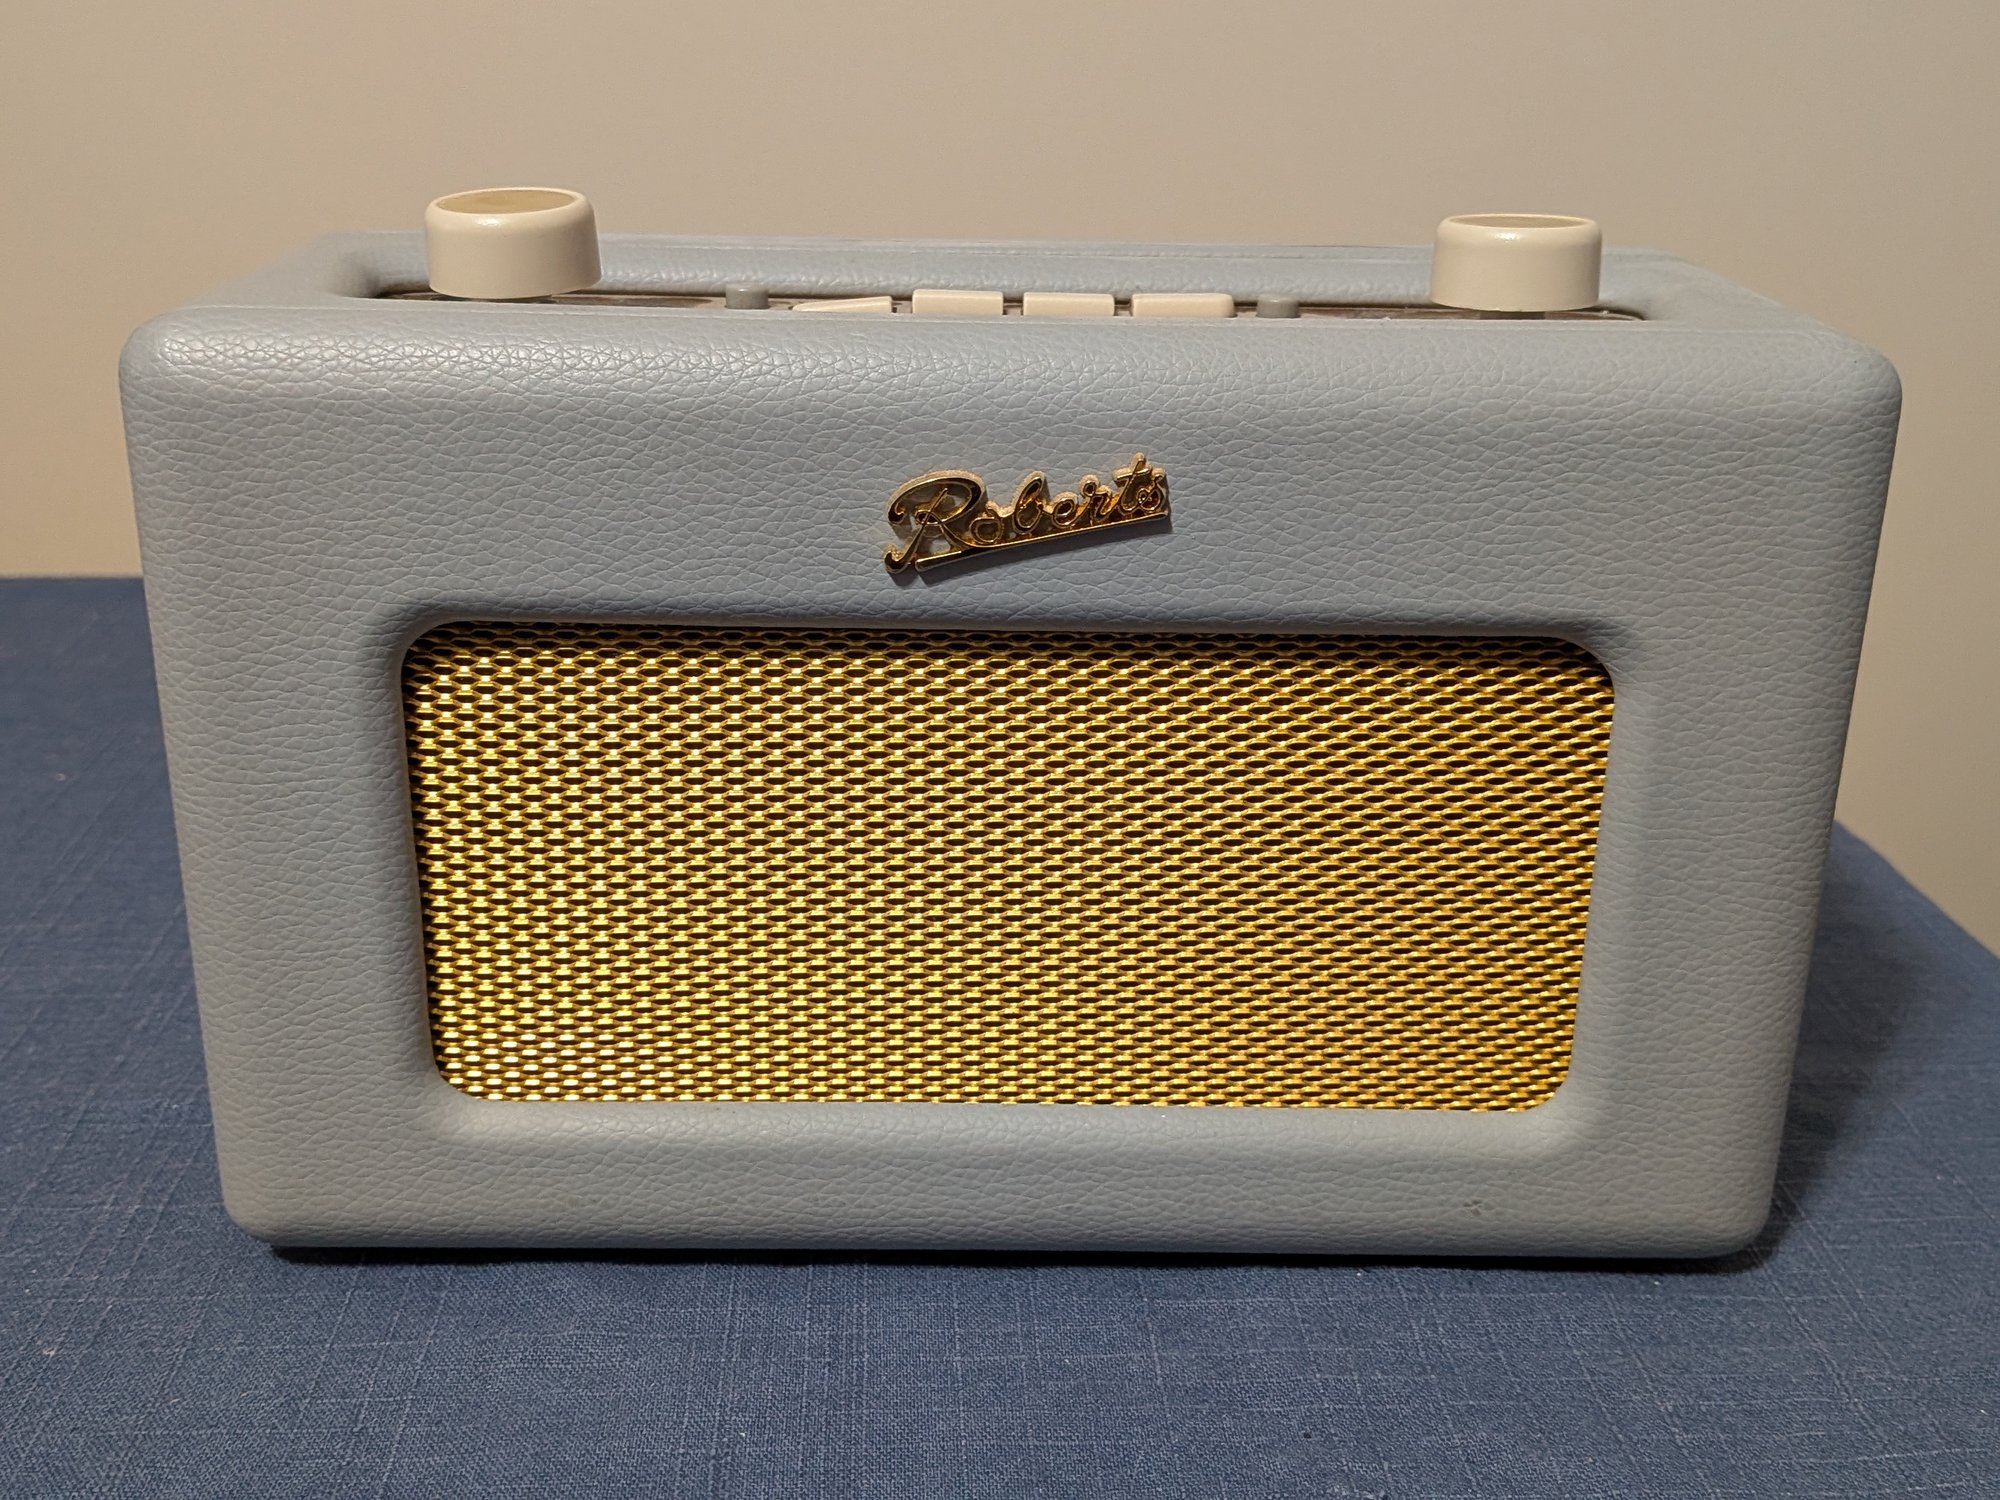
The first step involved finding a case. This was easier than I’d expected and a simple eBay search for ‘broken Roberrts radio’ yielded a load of options. I picked up a grey one that used to be an internet radio; this meant that it had a display and two knobs already fitted and a few buttons for station selection.
The radio really was dead. I looked at the circuit board to find that one of the capacitors had exploded and taken most of the electronics with it. So I removed the circuit board and bought a display and a couple of rotary encoders to fill the gaps.
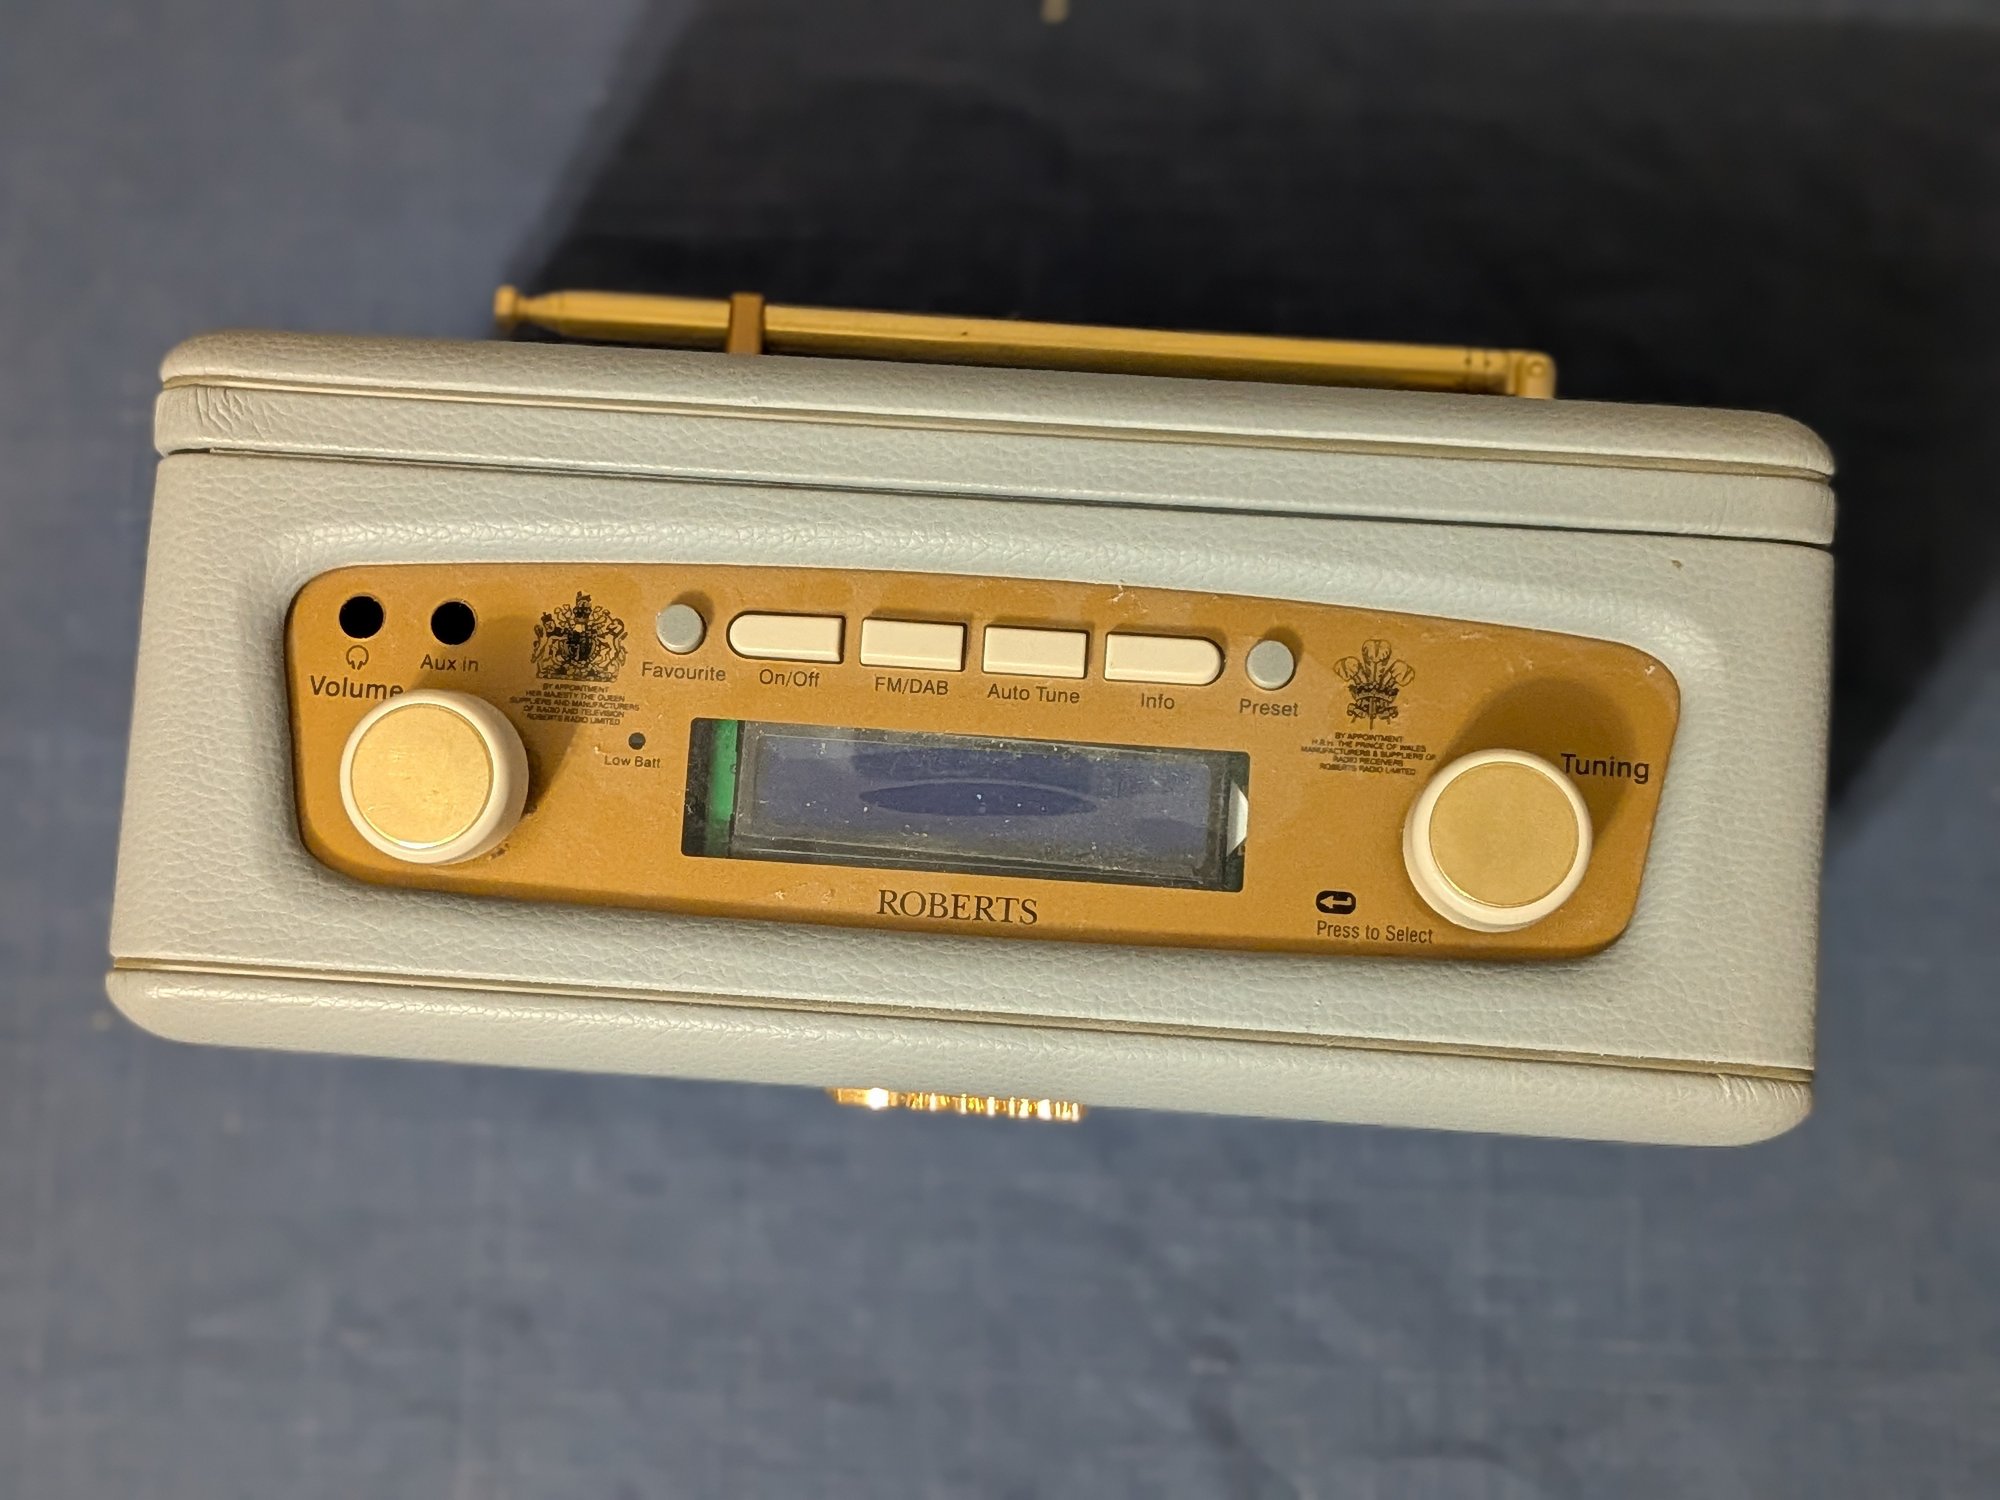
The big problem was that the circuit board doubled as a mount for all of the controls. Without the mount I’d have to find something else. The knobs were easy enough because there was always something in the plastic frame that they could be secured to to stop them rotating along with the encoder (or falling through completely!). The display was another matter. I had to 3D print a new mount that would hold the display and fix into the frame.
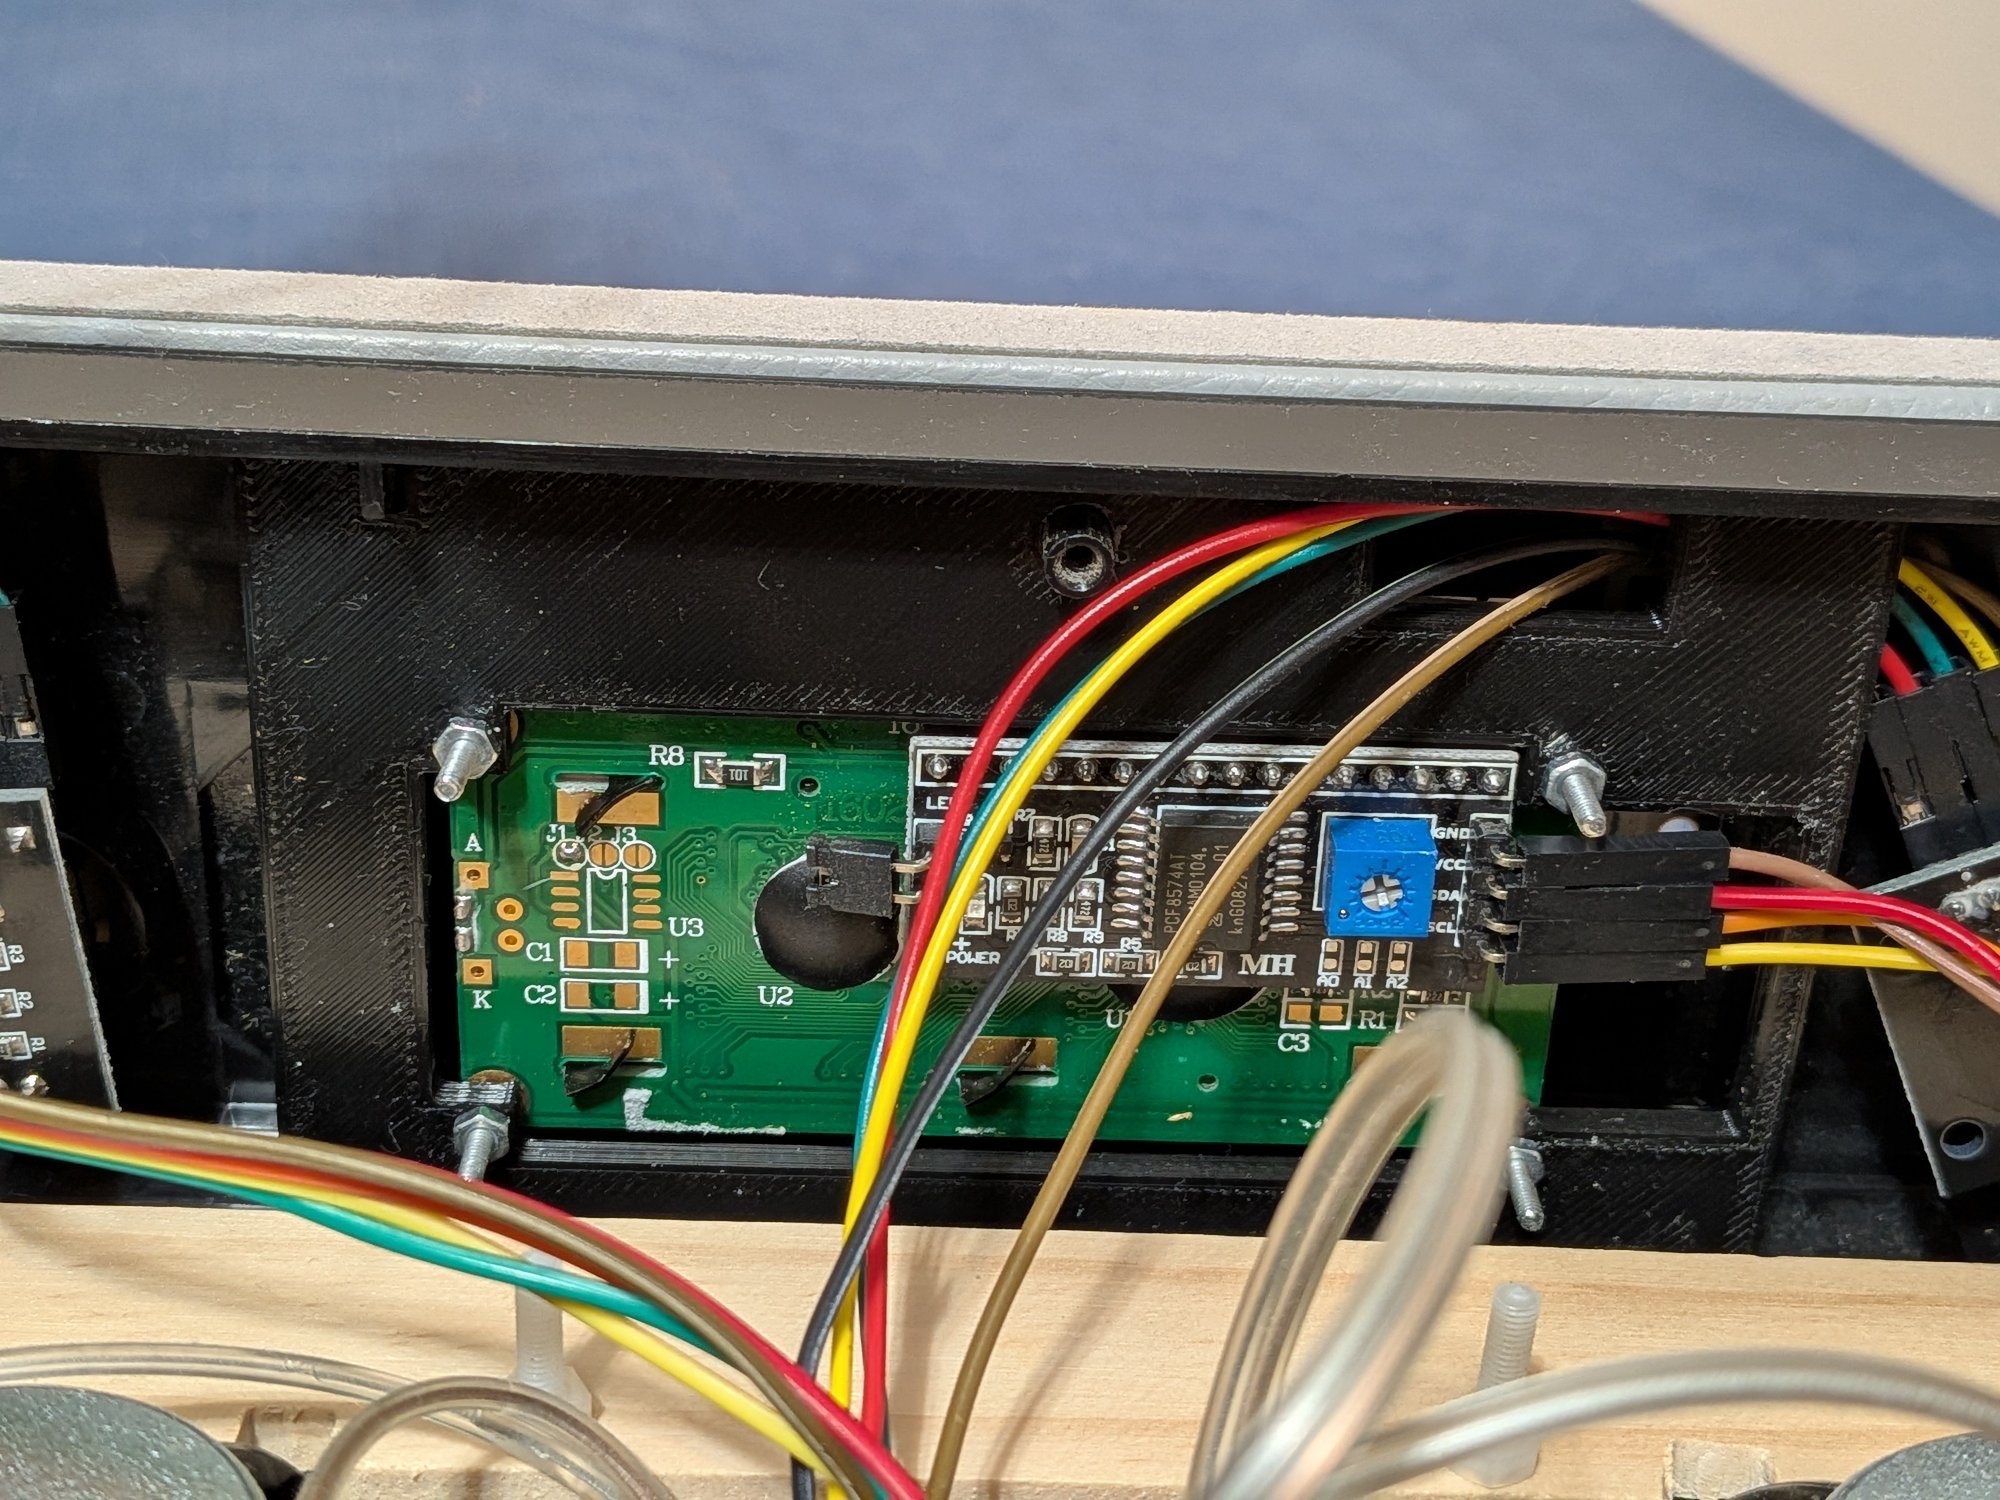
Getting the design right was fiddly to the max. The display did have mounting holes but the LCD part sits in front of them. This meant that the new mount had to have a ‘well’ into which the display would sit. The underside of the display is also not flat; the depth of the border around the LCD is different on one of the sides. There is also a ‘backpack’ that converts the signals so that only two wires are required for control (two more for power). The mount has to stay out of the way of the backpack but still hold up the display.
Sigh.
After many attempts - I think five - I had a frame that would fit the display and the radio frame.
So with the radio controls in place it was time to look at the speakers. It was easy to get a couple of ‘full-range’ loudspeakers from Pimoroni and fitting them was easier than I’d expected thanks to IKEA! I found a wooden photo frame that was exactly the right width and cut it to the right height; because it was a frame there was even an inset part for attaching the speakers. The bottom half of the frame is behind it, holding the top half in place and providing somewhere to mount the electronics.
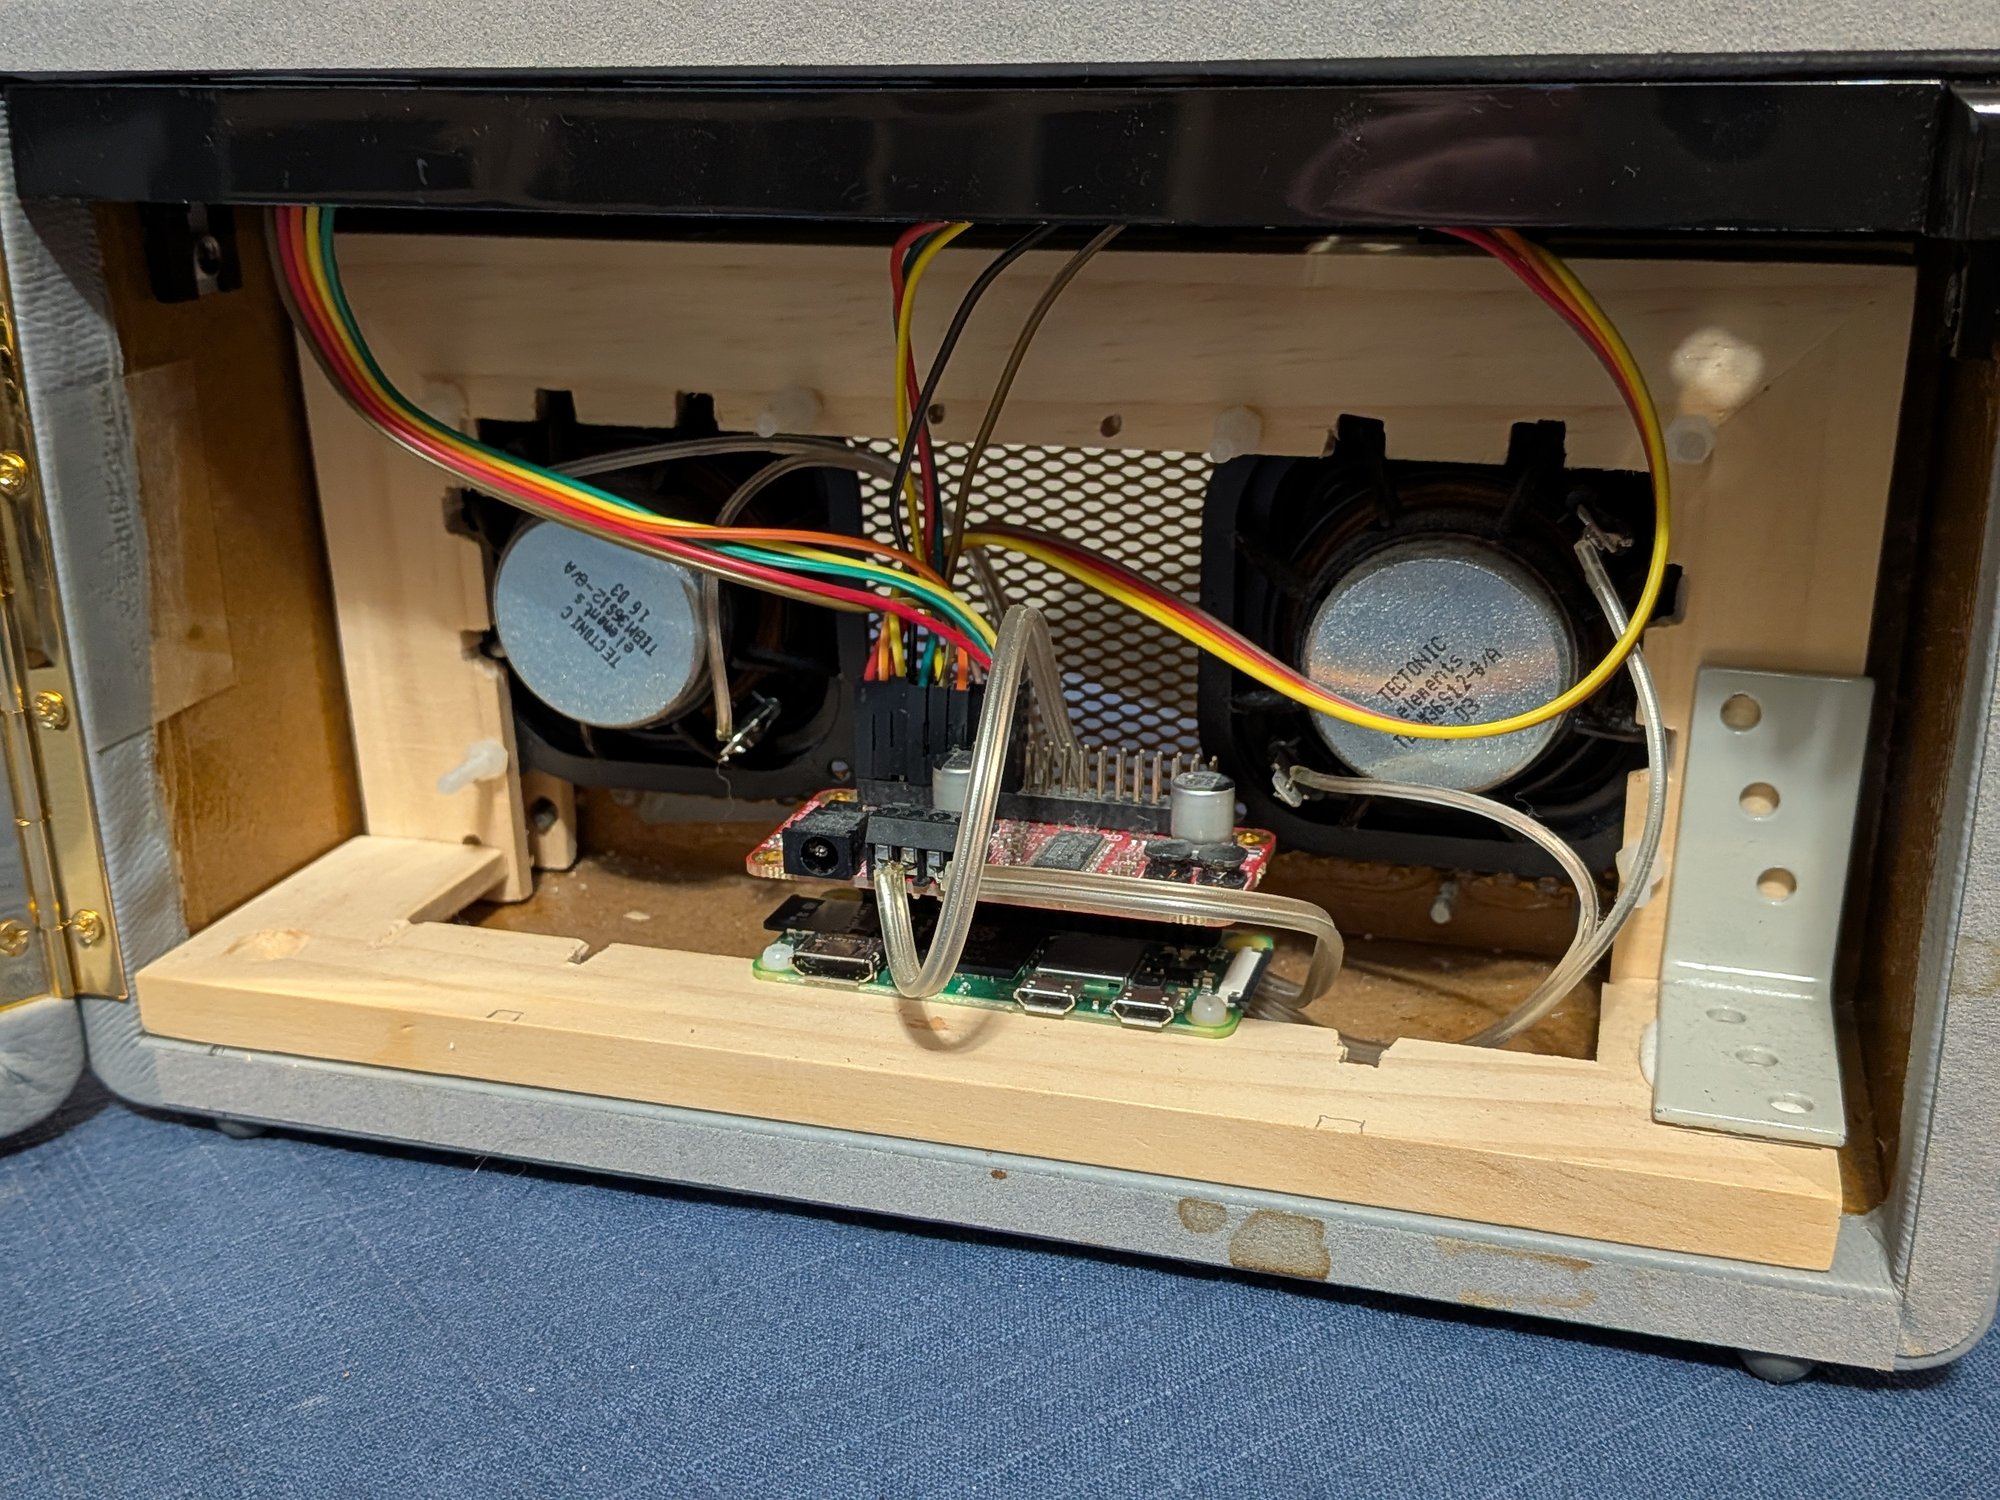
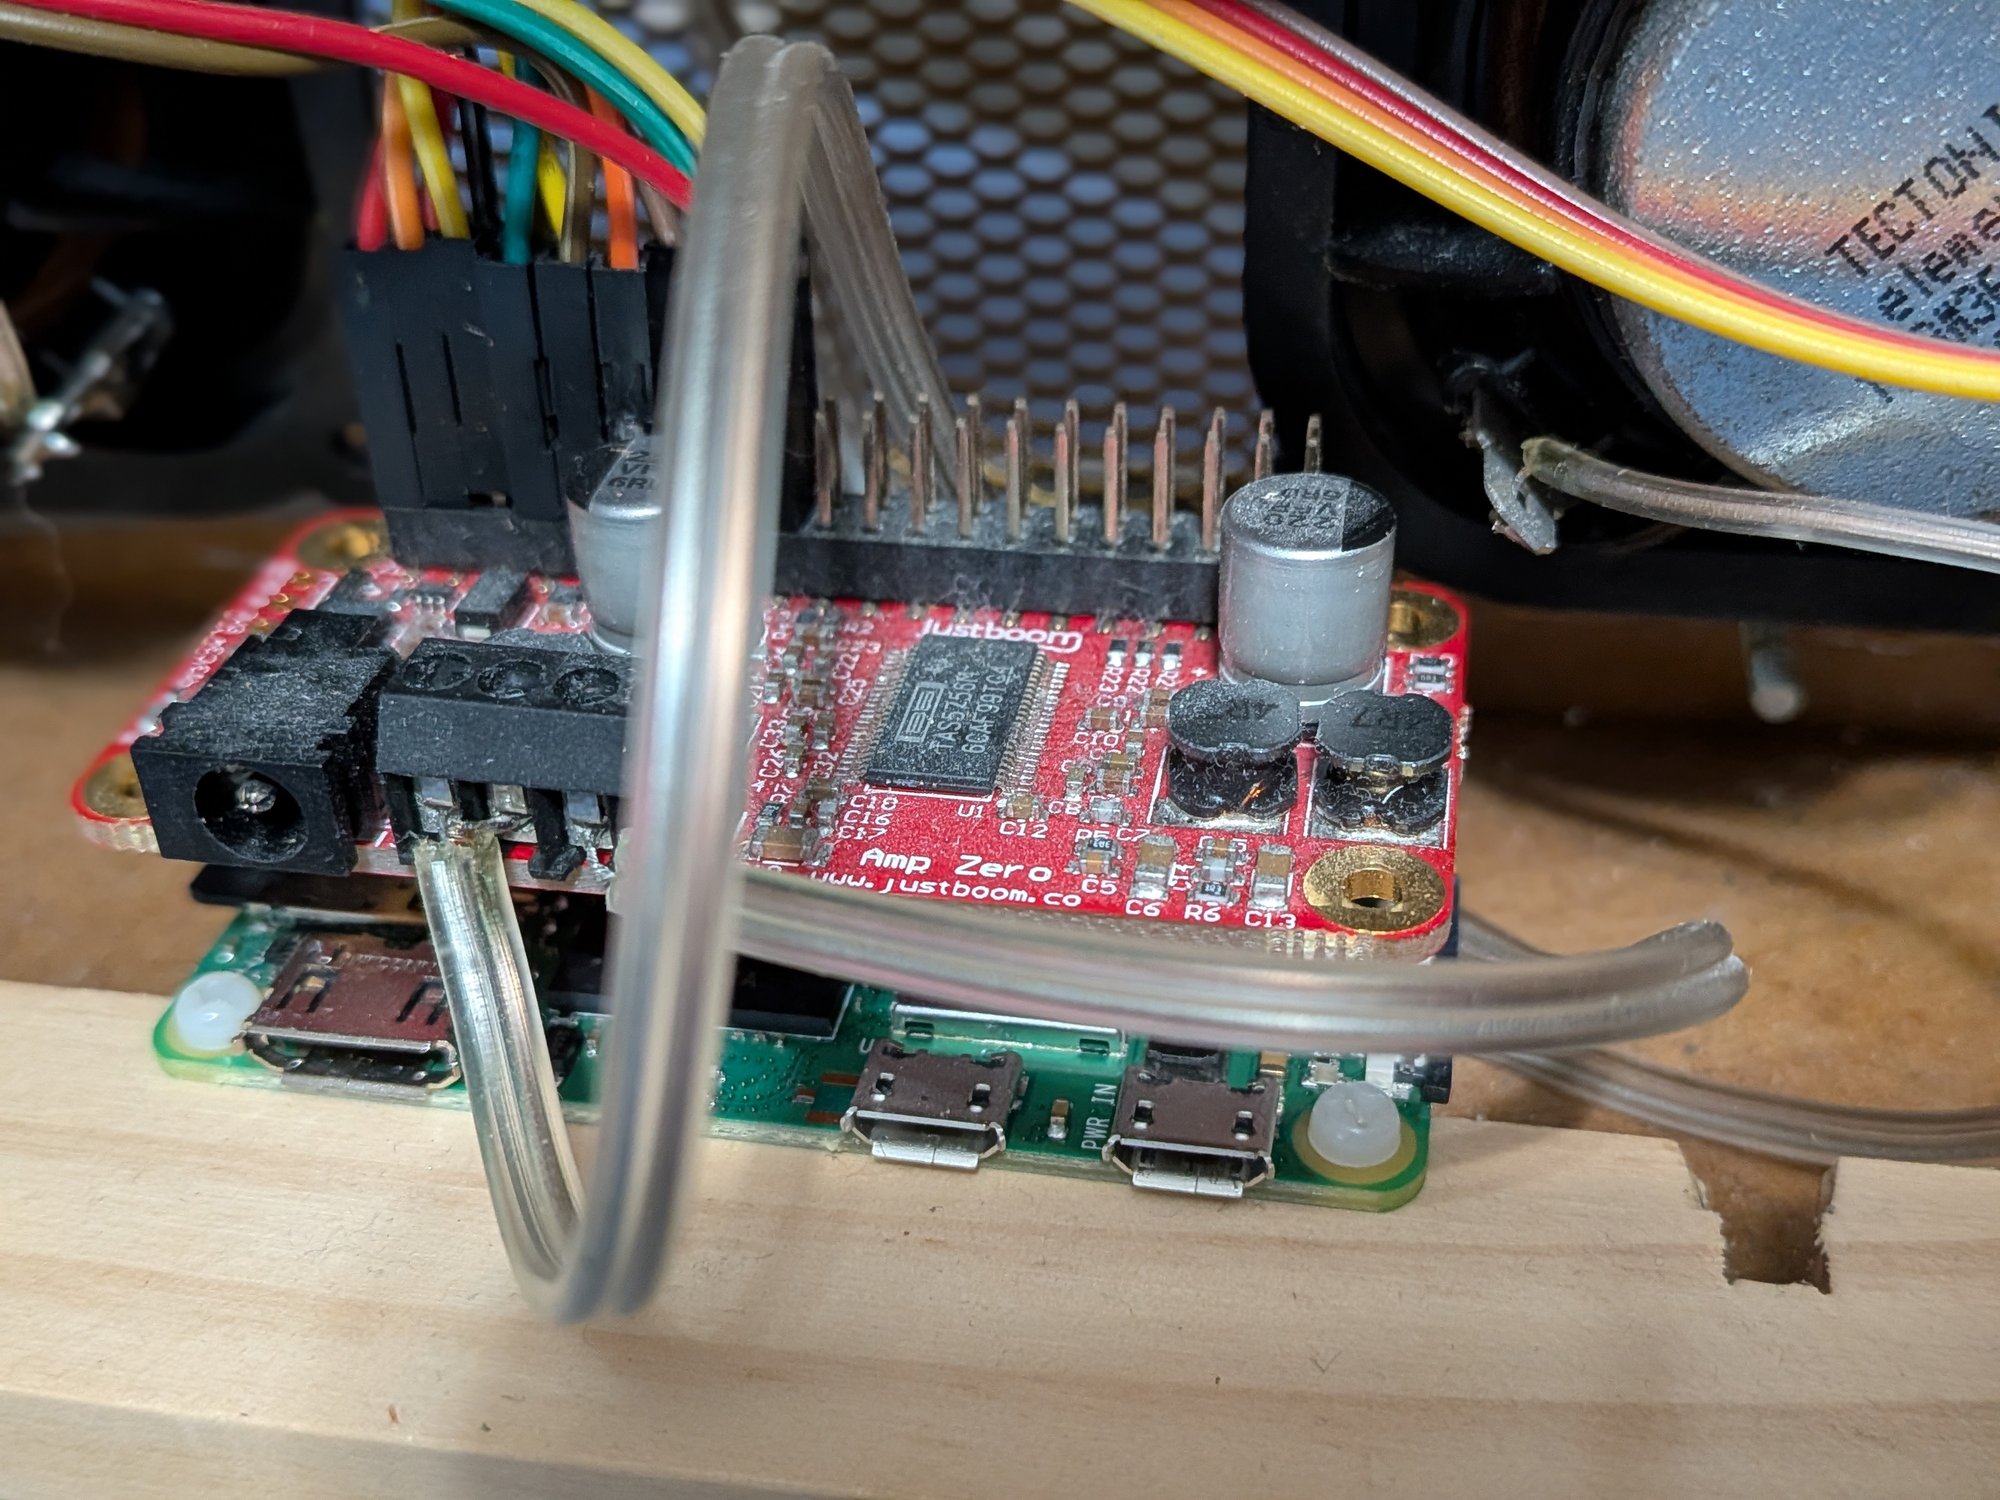
And now to the brains of the operation. I used a Raspbery Pi Zero W and a JustBoom Amp Zero for processing the audio. The Pi has more then enough power for streaming and decoding MP3 from the internet and the Amp Zero can convert it to a loudspeaker signal. The whole thing can be driven from the Pi’s MicroUSB power although the Amp is limited to about 5W. That’s fine as the speakers are tiny and I don’t need much volume. (The Amp can be powered from a 15V supply for more power if I really want it.) The Pi can read from two rotary encoders and send output to the display with absolute ease. The only disadvantage is that the startup and shutdown times are lengthy, with no instant on and off that a microcontroller would exhibit. I can live with that.
For the software there’s a fabulous creator called Bob Rathbone who has made a radiod daemon that does everything: stations, display and controls. There’s even a huge PDF guide (249 pages!) covering every combination of Pi, sound HAT and display you can think of. I highly recommend checking out his web pages about the radio daemon. After setting up the Pi and installing his software, I had an internet radio! Stations, controls and even an easy shutdown option (press the station select knob for five seconds).
I’m delighted. And that’s rare.